~ THANK YOU~

for sharing all your neat projects, crafty things and garage-sale, yard-sale and flea-market finds.

Pages

Thursday, June 2, 2011

Hand Made Christmas Ornaments 2010


This post is for all the neat and inexpensive Christmas ornaments I made for Christmas 2010


Wall Art


 I should seriously consider keeping track of just how many glue sticks I go through in 1 year. I would like to order them by the case to ensure I always have some handy.  I began toying around with using thin balsa wood to create some modern geometric wall art, then found an awesome tutorial on BBQ skewer star-burst mirrors and got started as soon as I found the time.

I need lightweight wall art. I have several pieces of heavy wrought Iron decorative wall hangings but my goodness they are heavy = I cannot bear making any more holes in my walls due to the wall anchors and plugs and such and have been unable to find large but lightweight and reasonably priced art pieces for my home = so CRAFT!


..... so far


All Halloween Crafts

These photos are all links to the Halloween crafts I have made


please click on the photo and it will take you to the how-to with more photos


more to come.......


Tuesday, May 10, 2011

Spring Summer florals 2010


 ..... yep all from the dollar stores, again. Except for the shiny ficus leaves which I removed from a ficus tree that  I was throwing away. These ficus leaves have come in handy! I painted a few for my X-MAS 2010 and they looked lovely. I removed them from the main branches of a tree and have used them in several ways. They can be purchased at dollar stores on a stem.................. but I happy to recycle♥

This colour scheme is not me.... at all! I actually hate that chartreuse colour, but did not mind it with the greenery, and collected with the browns and white flowers they look alright.

The Gerberra daises, Ivy, and the fake looking (lol) Orchids as well as the succulent looking spike things came from the DollarRama, the white ANEMONE, Chartreuse ANEMONE, Brown Daisies, white lilac looking things, the more realistic Chartreuse Orchids, and white roses came from the Loony Twoons dollar store in my town.

the pine cones are from my mom, and I already had the vases on hand. I hot glues many of these to BBQ skewers to create height - they are peeking out in most photos and I plan to paint them to blend in. I will be doing a very similar floral look this year again. It did brighten up the rooms quite a bit - and I don't despise that glaring yellow/green shade anymore ~ Chartreuse.......


I picked up this tall vase at a thrift store for .25 cents
& painted it black ( poorly lol )

So; that was spring/summer flowers 2010 - I am just whipping up my 2011 summer flowers and will post those...... eventually

Sunday, December 12, 2010

Paper X-mas swirly things


These are by far my favirote handmade ornaments that I have made this year. It is a 3/4 inch by 8 inch piece of paper that I folded in half then curled both sides towards the center... I formed and glued the curls in position, then applied glitter to the face and and added black and silver glitter = so simple, so easy

The best part is that the sheet of Tiffany blue card stock/scrapbook paper cost .25Cents! I always have glue sticks and white craft glue on hand, and the black glitter I bought years ago. So to make 16 of these, I only needed 1 sheet of the card stock! HOW AWESOME IS THAT!!!!

These were super fun to make. I could not find silver card stock in my town. All the ladies at the various scrap-book stores in my town say there is no such thing as silver metallic card stock that is shimmery SILVER ON BOTH SIDES. So I will have to look on the internet for some because next year I want to make these in silver and try out a few more different styles Christmas paper ornaments.

However I may purchase some thick card stock and  PAINT IT SILVER with craft paint, that seems to be a more economical and simple solution. I want a shimmery reflective silver, for next year in this design, so I have some time to figure something out ( lol ).


I am linking this to the DIY Showoff,
using tomato cages and pre lit Christmas garlands for a small tree was genius! I am doing this next year!!!!!!!


Under The Table and Dreaming

and The Shabby Nest ( there is 360 entries on there - check it out! )

and any other linky's I can find later today. I loooovoe those linky's! I could easily spend 3 hours checking out the things people post!

anyhoo- here is a few more photos with the same instruction from my last post ( The snowflakes HERE ). I am very pleased with these! I hope to find a few more easy to make and lightweight Christmas ornaments for my  ALL HAND-MADE Christmas tree 2010


it costs .25cents for 16 of these swirly drop things = yippee!

after cutting the card stock, and curling the tow sides towards the center = 28 pieces

Gluing 2 individual curls together

up on my tree

!!! Award Winning Photo !!!


Wednesday, December 8, 2010

Paper Christmas Tree Ornaments


( I still need to glue a crystal gem into the center of this )


 I spotted this idea on Google images - this is sooooooo easy and so simple and pretty!  I am going to the scrapbook store when it opens to buy more paper!

basically I cut 8 inch strips by 1/ inch strips and folded in half. I rolled up each sides to wards the center using a pen, then I formed the curls into the shape I wanted and used glue gun to affix each curl in place. I then glued each formed piece to each other using glue gun glue.

EDIT: LOL I give terrible instructions, hope the photos explain better than I can

 The last teal snowflake I made, I glued each curled -but not glued- piece to each other, before I glued the curls into place ( make sense.... ) This way I was better able to have uniform segments. But I think that becuase each segments curls are different, it looks more home-made and quaint ( although, it is hard to even see that as each little curled segment is slightly different from each other )


so far I have added this to Whatever goes Wednesday at Someday Crafts


I'll have to hunt around in the evening for other awesome crafty blogs to add this too.

I am soooo grateful for these linky-party things, and am happy to read all the awesome crafty-renovating-decorating blogs out there. There is hours upon hours of awesome stuff to read with fabulous helpful ideas every single day.

Thank you to every single person who shares their awesome ideas on the interwebz!


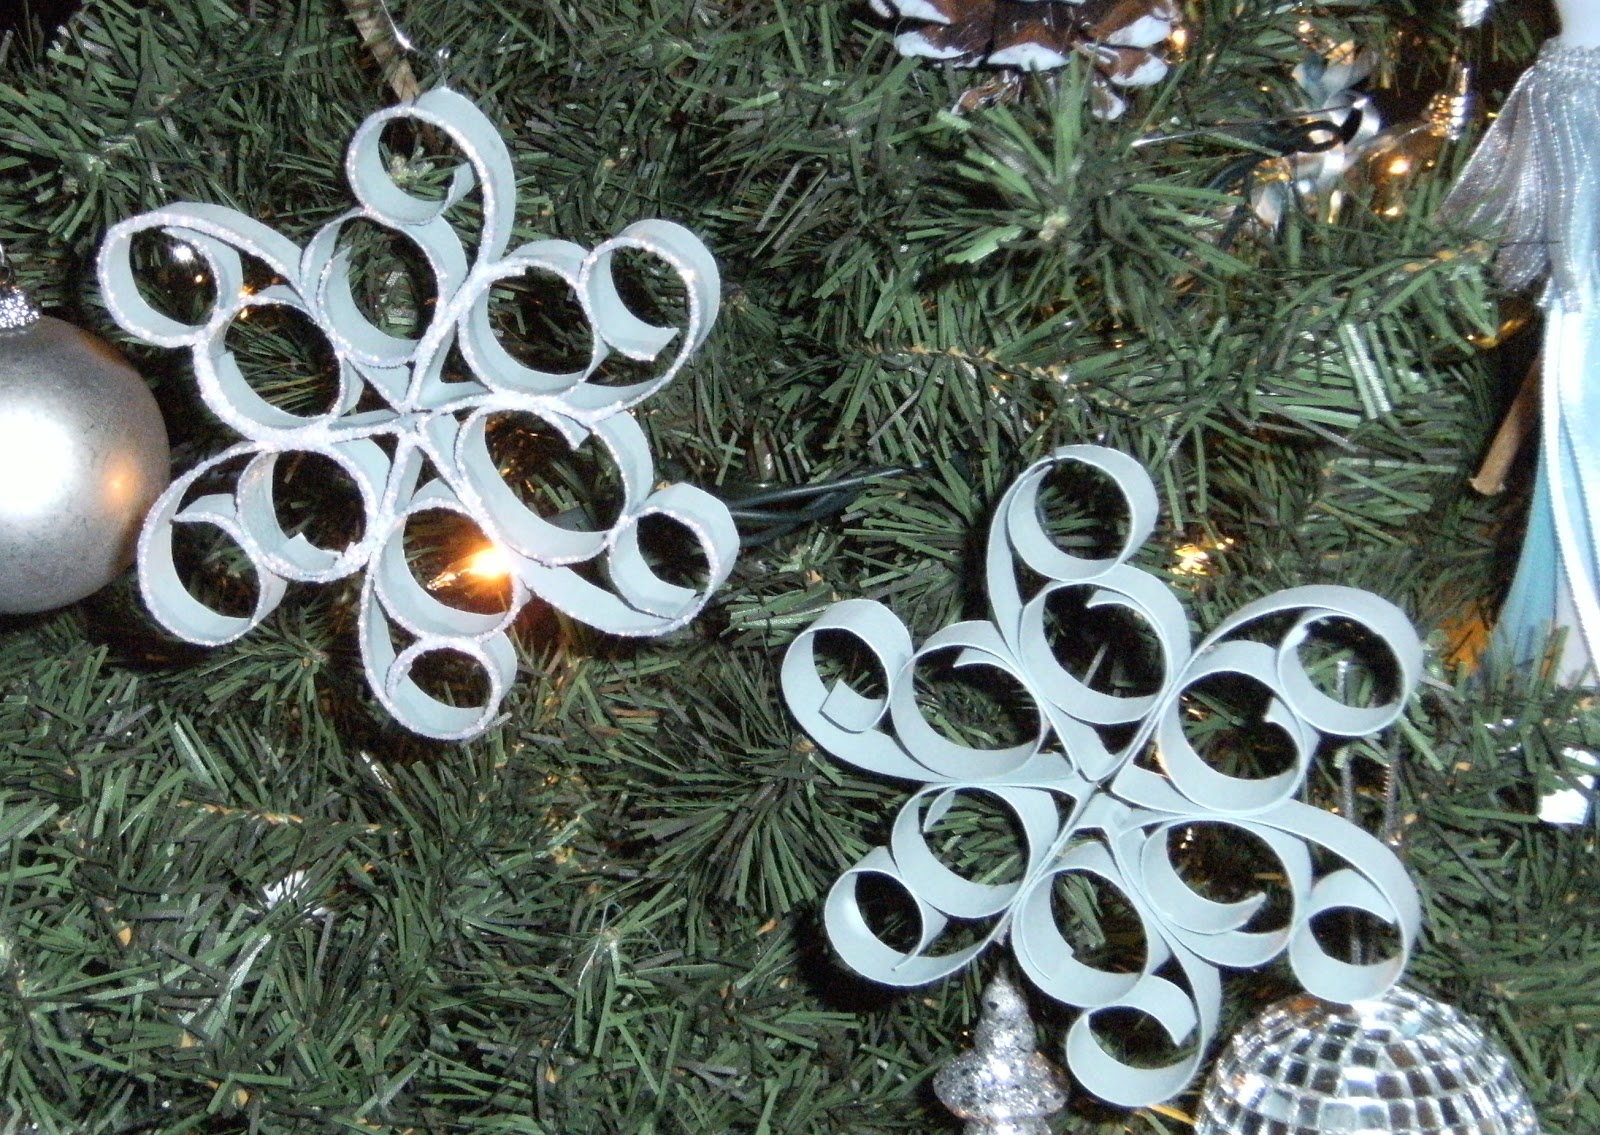
So; from a 12' x 12' piece of scrapbook paper I cut out 1/2 inches by 8 inch pieces. From this i made 5 snowflakes.  I am trying to make 5 of each unique hand-made Christmas ornaments.


on the left = glitter, on the right no glitter, yet = I ran out of regular white glue

Here is the second one I made with my practice card-stock...... I think 6 segments looks best and is smaller and cuter

fold paper in half, curl towards center rolling with a pen or dowel.....

shape and glue

here is one glued together
 another angle
 and on the tree

 left is a larger snowflake made with 8 segments, and the 6 segments on the right

8 segments


THIS IS WHAT i AM MAKING TONIGHT! Although I think the snowflakes are pretty, these are waaaaaaaaaay more appealing to me and I am picking up some silver card stock and whipping up a few of these tonight. This is just 2 of the same segments I made above, using 8" by 1/2' inches and gluing them together.

some experiments..........


I am in loooove with these.... its just paper and glitter.....


same technique...... I am in love with the red/black glitter and am majking htese with silver paper and black glitter tonight!

here is another paper ornament floating around on the interwebz...... I will have to find the link to the blog where I firts saw this. it looks complicated but is very easy. I wnat to make a few smaller ( 5") white ones for my tree.
 I used thick scrapbook paper and marked off the center lines


whoops - Here is the link tot he lady who made these below at House Revival's Blog


 here is a few more I made with different dimensions/designs.  It is hard to figure out what size to cut when I have no instructions. When I finish making these I will post better instructions